Imagine being asked to do something ASAP without knowing what ASAP means. Rather than hopping into action (or at least knowing you are supposed to!), you would just be left feeling confused.
This is how I think of ‘cues’– they are like short forms used by instructors in yoga and fitness classes.
They can efficiently guide the class into correct form, ensuring everyone gets the most out of the poses, and most importantly, stays safe. However, they are only helpful if the class understands their meaning.
When I was a beginner I had an experience where the right cue made all the difference. We were doing a core exercise lying down, and the instructor said our lower backs should be flat.
This confused me; my back definitely wasn’t flat.
But I shrugged it off, thinking maybe I had a bit more curve in my spine than others. It wasn’t until another class, where the cue was to push your lower back into the ground, that it clicked. It wasn’t that my back should naturally be flat; it was an active process—I had to make it happen.
The first instructor hadn’t said anything wrong, but her cue confused me since I wasn’t already familiar with the concept. Once I understood, then simply hearing ‘lay down with a flat lower back’ was enough.
I’ve put together some common cues that I use in my classes with deeper explanations. I hope you will find them helpful!
Core Activation
Engage Your Core
Activate those abdominal muscles! You might also hear phrases like contract, tighten, firm, or stabilize your core/abdomen. This is a very important one! I wrote a whole blog about how to engage your core, you can click here for more detail.
Draw the Belly Button Towards Your Spine
This cue helps you understand how to engage your core. A common misconception is to achieve this by sucking in, but that is not the case. When you properly activate your abdominal muscles your belly button with draw inwards.
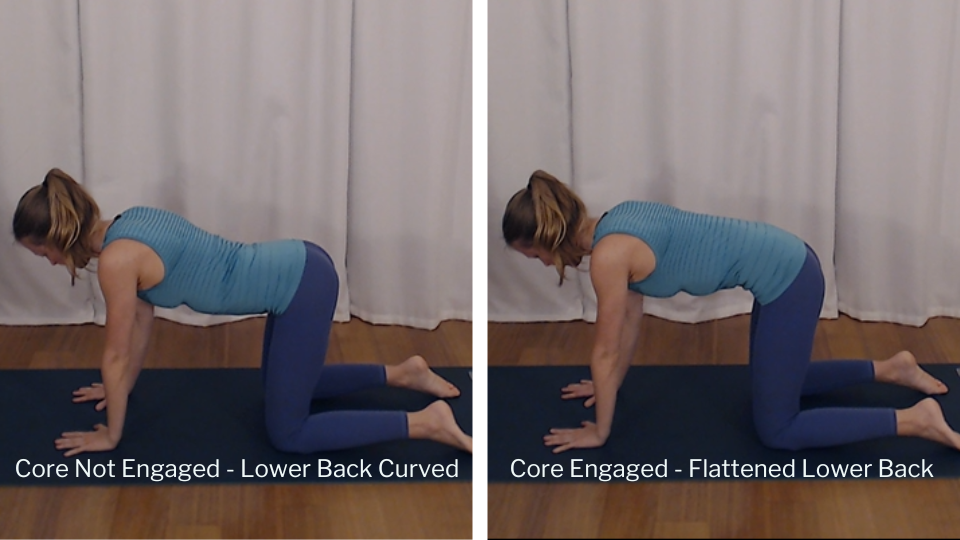
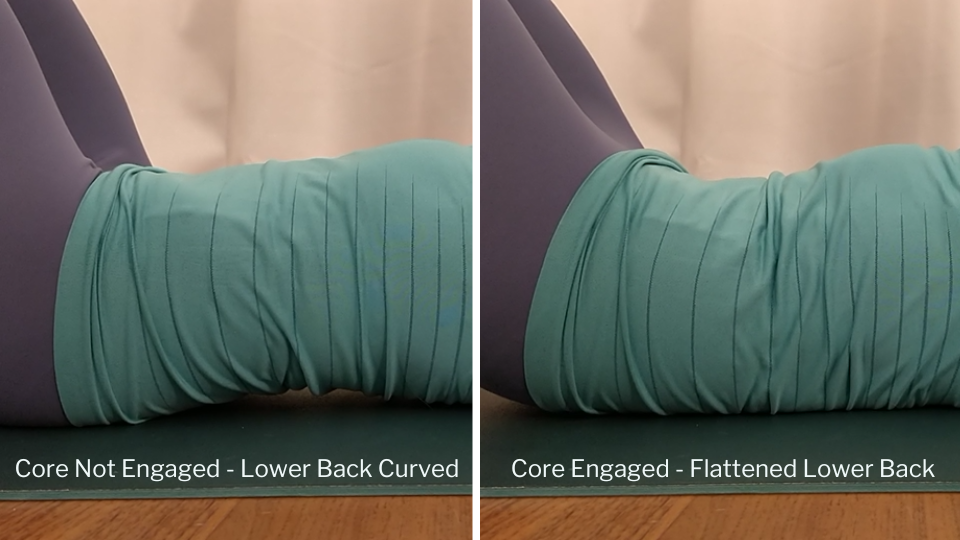
Flatten Your Lower Back
This is another cue to help you understand how to engage your core. You need to use your abdominal muscles to achieve this. This one is used when lying down, or when on hands and knees. When lying down, another cue can be to Push Your Lower Back Down into the Floor.
Posture and Spine
Neutral Spine
Maintain the natural curve of your spine. This is to ensure you are not slouching when standing or sitting and not arching or rounding your spine when on your hands and knees.
Keep Your Neck in Line with Your Spine
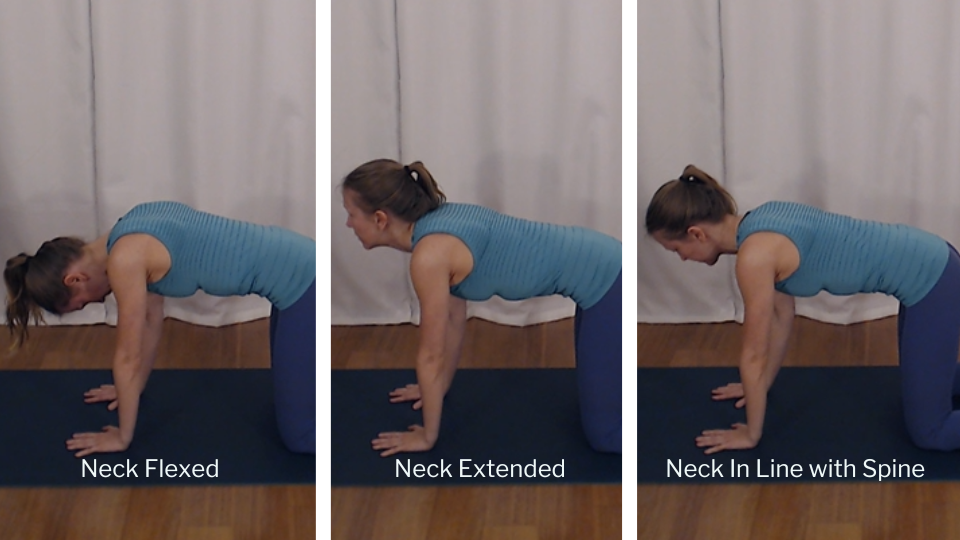
This is often used when on hands and knees to prevent hanging heads or strained necks. Imagine your neck following the same line as your spine, just like when standing. Your gaze should naturally be down at your mat.
Lengthen Your Spine
This is similar to a neutral spine, which ensures you have proper posture. Its meaning goes a bit further, by telling you to sit as tall as you can, creating space between each vertebra. This is commonly used before leaning forward or doing a twist.
Shoulders and Upper Body
Soften Your Shoulders
This cue encourages you to relax. We often unknowingly hold tension in our shoulders, so drawing our attention there helps us intentionally release it.
Shoulders Away from Your Ears/Lengthen Your Neck
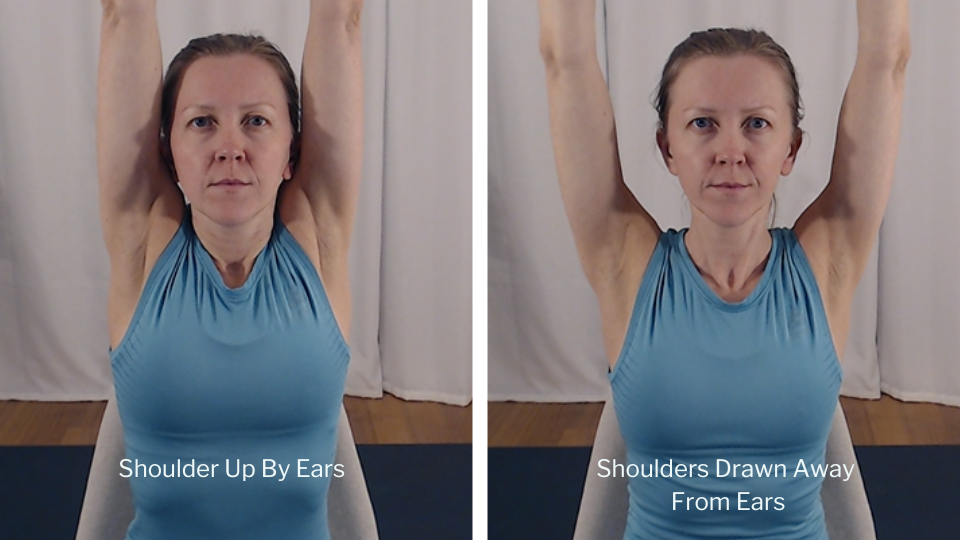
Taking it a step further from softening, this cue actively guides you to push your shoulders down. Without doing so, your shoulders may creep up as you raise your arms.
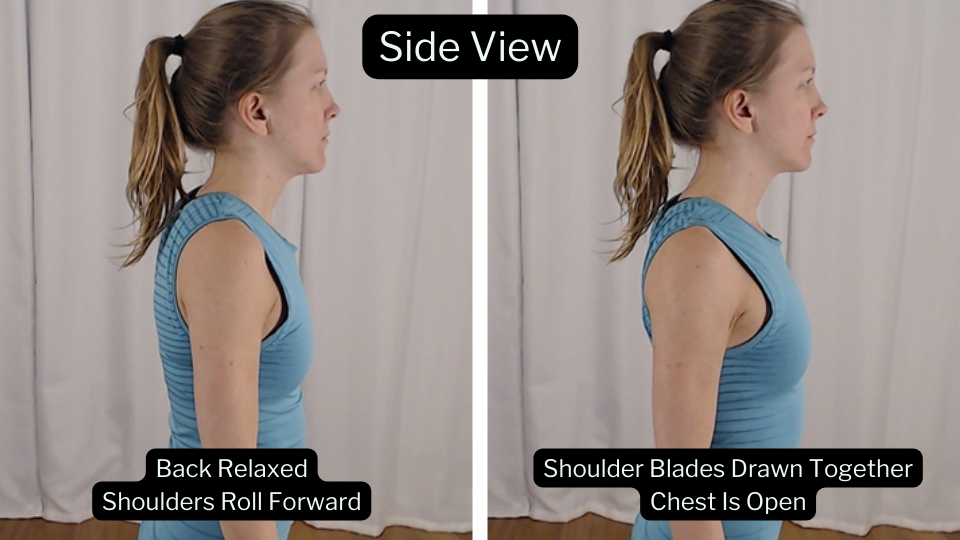
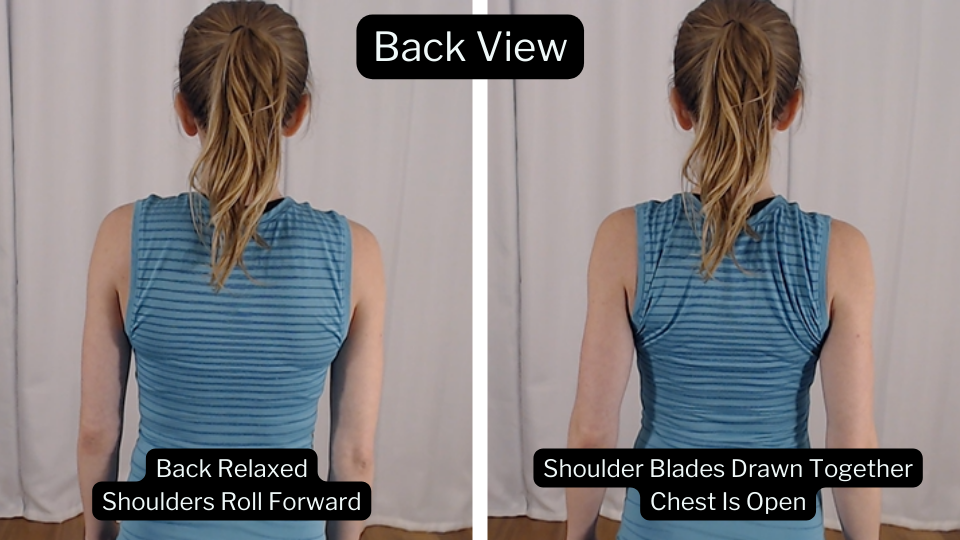
Draw Shoulder Blades Together/Open the Chest
This requires you to activate your upper back muscles and push back with your shoulders so your shoulder blades move towards the midline of your body. This ensures proper posture, preventing the common tendency for shoulders to round forward.
Engage Your Upper Back/Lift Your Chest
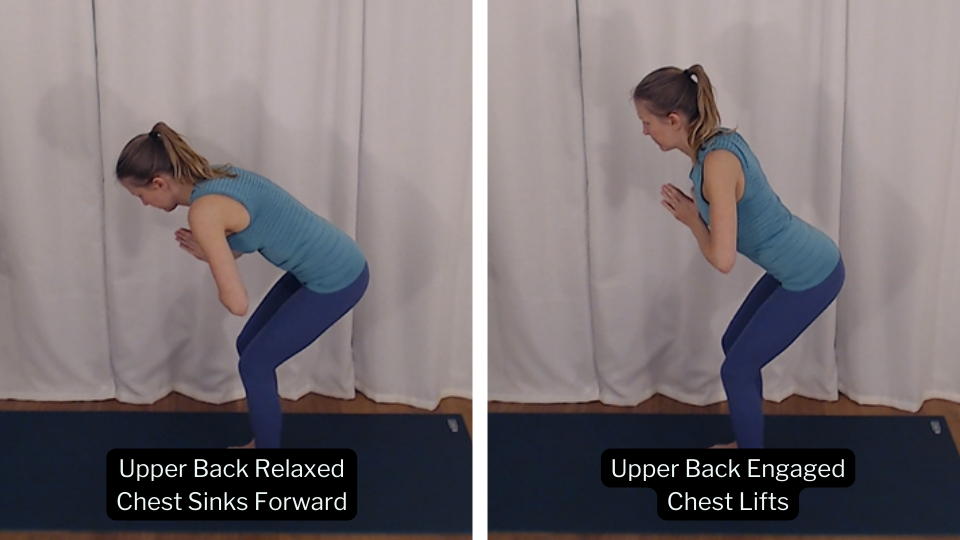
Similar to the previous cue, but often used when leaning forward. Leaning without muscle engagement tends to round the spine and sink the chest. By activating your back muscles, you not only maintain a lifted posture but also strengthen your back.
Hip and Pelvic Alignment
Square Your Hips
Ensure your hips are level, avoiding one side lifting or tilting higher than the other. It can also be used as a guide for the direction your hips should be facing, such as “square your hips to the front of the room”.
Hinge from Your Hips/Lift Your Tailbone
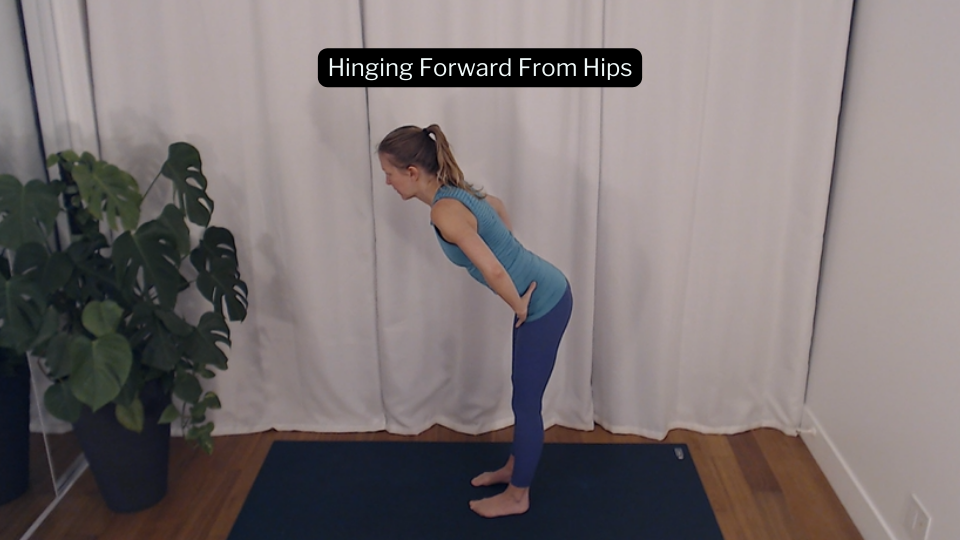
This is an important cue because it addresses the tendency to lean forward by rounding the spine. However, many poses should be initiated from the hip joint. Picture standing with your tailbone facing downward; now, as you hinge forward at your hips, your tailbone lifts behind you.
Body Awareness and Breath
Listen to Your Body
This cue is telling you to listen to your body’s signals and only do what feels right for you. If something feels too intense, ease off. Staying tuned into how you are feeling helps avoid injuries. Importantly, what feels comfortable one day might not on another—our bodies respond differently based on factors like recent activity, fatigue levels, or recovery from injury or illness.
Notice Your Breath
Simply shift your attention to each breath you take. It’s a tool for staying present and doubles as a check-in to ensure you’re not holding your breath or breathing too quickly and shallowly.
Lengthen Your Breath
This requires you to notice your breath and then take it a step further. With intention, start to Inhale and exhale more deeply but slow and in control. Initially, it might feel challenging for extended periods, so return to your natural breath whenever needed.
This is just a sample of cues that can be used, however, I hope they help you build a strong foundation moving forward in yoga and fitness classes. Keep in mind that there are often multiple ways to convey the same idea, and instructors may offer different cues for the same movement. So don’t give up if you feel confused during a class. Your instructor is there to guide you every step of the way—ask questions, request more details, or explore alternative cues until you find the one that clicks!


