Five Common Mistakes Made In Plank – and How To Fix Them!

Planks are one of the most ubiquitous exercises- you are just as likely to find them in a yoga class as at a fitness boot camp. It’s not surprising they are so popular since planks are one of the best exercises- they are extremely effective and target muscle groups throughout your whole body, particularly the core!

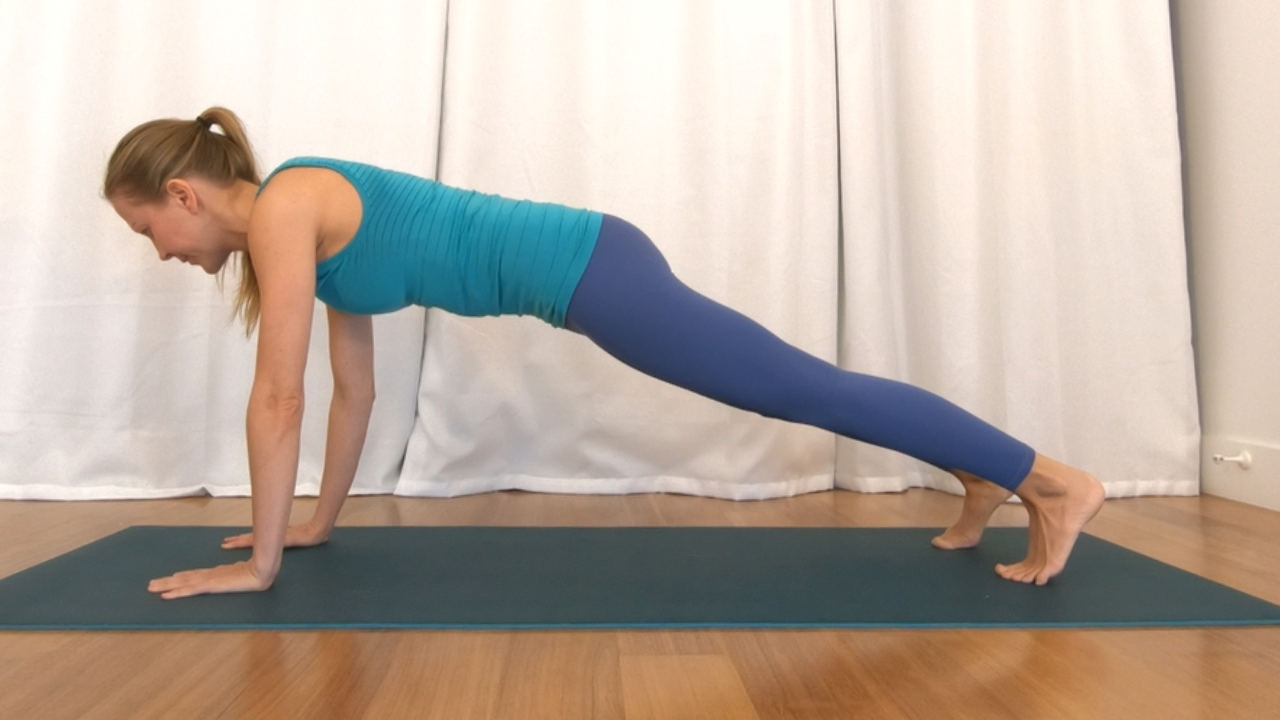
However, the key to them being effective is doing them properly

Here are five common mistakes when doing a plank and how to fix them:

1. Shoulders are too far back, and bum is in the air

It is common to shift your shoulders back as you get tired. This transfers your weight back and allows the abdominal muscles to relax- which certainly makes things easier, but it’s not a plank!

How to fix this:

First, contract your abdominal muscles. If you aren’t sure how to do that, click here for my “Engaging Your Core” post. Then shift your shoulders forward until they are directly over your wrists. In the beginning, you may find it helpful to use a mirror or your webcam to help you see when you are in proper alignment.

2. Hips sink and lower back arches

This also happens when getting tired. It could also be from a lack of understanding of the core’s importance in a plank. So whether your abdominal muscles relax due to fatigue, or simply not knowing you are meant to activate them in the first place, the result is the same: the belly and hips sink. You will feel your arms, shoulders and upper back working overtime, and strain in your lower back.

How to fix this:

Contract your abdominal muscles and draw your belly button towards your spine. If you aren’t sure how to do that, click here for my “Engaging Your Core” post. Start to raise your hips until your body is in a straight line- from your shoulders, hips to ankles. In the beginning, you may find it helpful to use a mirror or your webcam to help you see when you are in proper alignment.

3. Chest sinks down

This happens when activating your core muscles but relaxing your upper back and shoulders. Your chest sinks, and your shoulder blades slide toward one another causing a sunken upper back.

How to fix this:

Imagine you are pushing the floor away from you. As you do this, feel your shoulder blades start to slide away from each other while your chest moves further away from the floor.

4. Head either strains upwards or droops down

It is common to lift the head to look straight ahead of you, which strains your neck, or to relax the neck which causes your head to droop down.

How to fix this:

Continue the natural alignment of your spine in plank by gazing at the floor a few inches in front of you, rather than looking up ahead of you or below, through your arms. Your neck should be in the same alignment as if you were sitting up, looking straight ahead.

5. Weight is only on the heel of the hand

With so much else going on in a plank, it is easy to neglect what your hands are doing. This often means they are in a relaxed state with your weight bearing down on your wrists.

How to fix this:

Spread your fingers wide and push down through your whole hand, all the way down to your fingertips. This will help distribute your weight and put less strain on your wrists.

Often these mistakes happen by stepping quickly into a plank without thinking much about it. Instead, I like to come into a plank step-by-step. By taking a little extra time you will get more out of your plank and not let the mistakes happen in the first place! Here is the order I use:

  • start on your hands and knees
  • spread your fingers wide and press down through your whole hand (if you experience any wrist discomfort you can go on your fists instead)
  • line up your shoulders so they are directly over your wrists
  • engage your abdominal muscles
  • step one foot back, extending your leg while trying to keep the rest of your body stable
  • continue to engage your abdominals while stepping back with your other foot
  • remember to breathe!
  • hold the plank only as long as you are able to keep the proper form, take breaks when needed

Start with a 20-second plank, and build your way up! Remember: more important than how long you hold a plank, is doing it correctly! I hope this will help you do just that 🙂

Stiff Neck and Upper Back?

Claim your FREE copy of my guide to feel the relief you deserve.

Learn a sequence of movements and stretches that:

  • is quick (takes less than 5 minutes)
  • is easy-to-follow (clear instructions for each)
  • will leave you feeling absolutely amazing!

Don’t miss out—grab yours now!